Highlight

Successful together – our valantic Team.
Meet the people who bring passion and accountability to driving success at valantic.
Get to know usThis website is also available in your language.
About
Highlight
Successful together – our valantic Team.
Meet the people who bring passion and accountability to driving success at valantic.
Get to know usAbout
Highlight
Successful together – our valantic Team.
Meet the people who bring passion and accountability to driving success at valantic.
Get to know usOur mission: Digital excellence for our customers.
With in-depth know-how, clear values, and a vibrant corporate culture, we shape digital transformations that make a real impact.
Careers
Careers
Highlight

Female Digital Impact
Women are increasingly shaping the IT industry – at valantic, we create opportunities together and promote talent so that diversity becomes a strength.
Turn your vision into realityCareers
Highlight
Female Digital Impact
Women are increasingly shaping the IT industry – at valantic, we create opportunities together and promote talent so that diversity becomes a strength.
Turn your vision into realityCareers at valantic – making a difference together.
Are you looking for a professional environment with challenging digital projects for renowned clients? You're in the right place.




Once you have logged on to the valantic Support Portal, you will be directed to the home page, which lets you access all functions. There you can quickly submit a new request, keep track of your submitted requests, and much more.
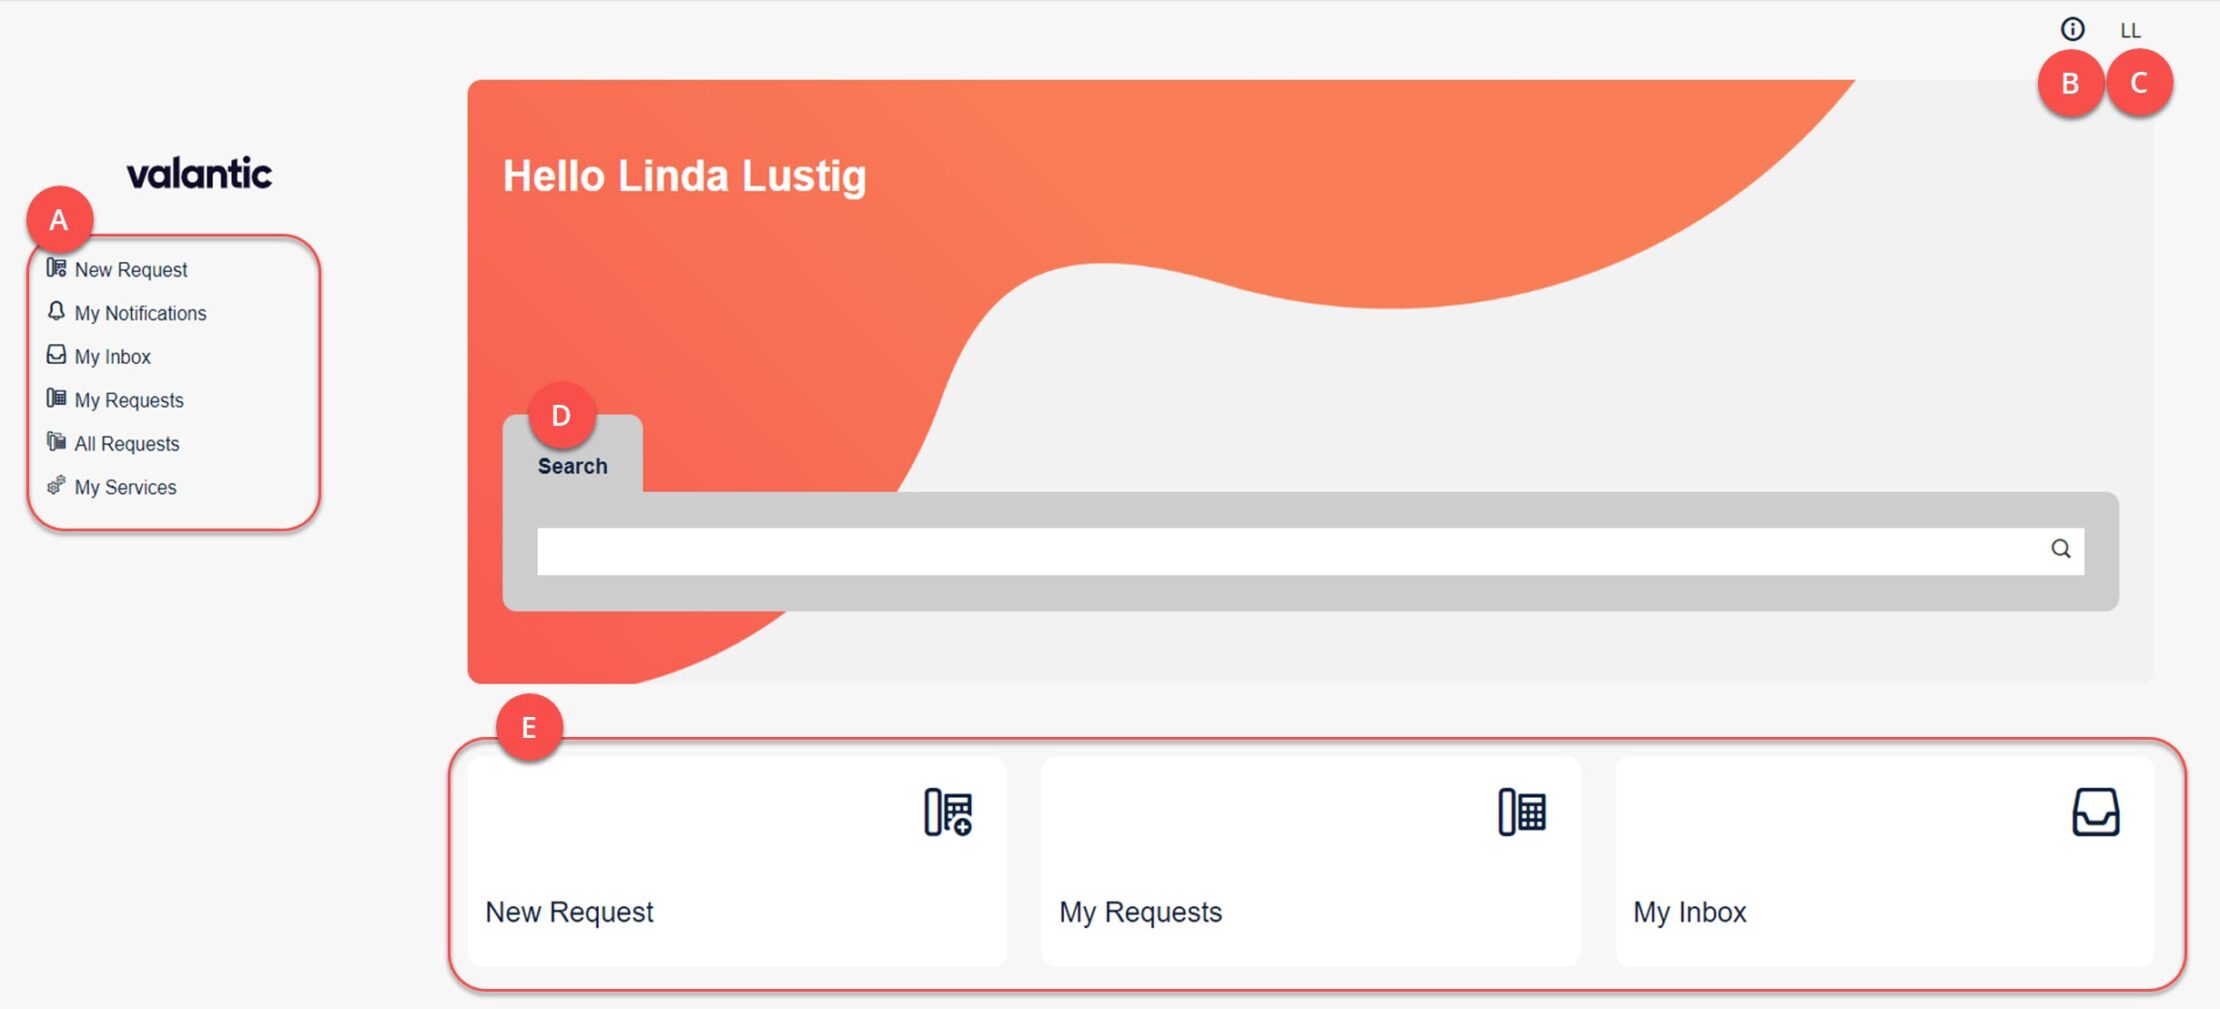
This is what you can do on the home page:
A. The following functions are available in the main menu:
B. Quick Start Guide: Quick overview of how to use the service portal.
C. In the user menu, you can find the “My Profile” and “Sign Out” functions.
D. You can use the search function to search for and directly call up a specific service request. Enter a search term or service request ID.
E. Quick access to the main functions “New Request,” “My Requests,” and “My Inbox.”
In the profile settings, you can change individual settings, including language, notification, access, and security settings.
This is how you access the profile settings: In the header bar, click User Menu > My Profile.
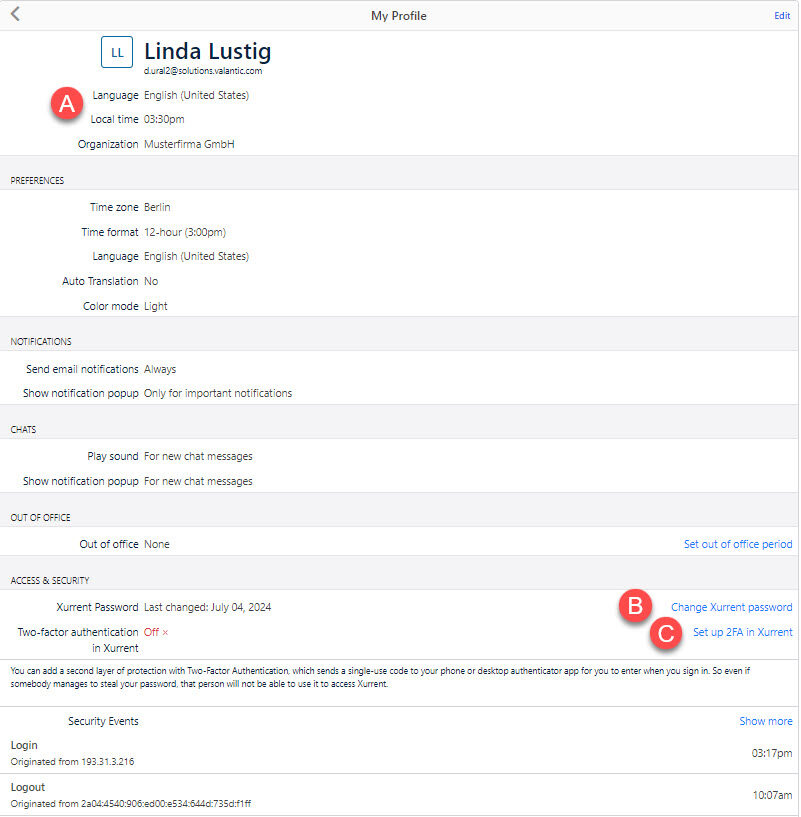
A. Change settings such as language, color mode, notification, chat, or absence settings.
B. Change password.
C. Set up two-factor authentication.
The most important functions are described in detail below.
Setting the Time Zone and Language
Changing Notification Settings
Changing the Password
Setting up Two-Factor Authentication
For security reasons, sign out once you have completed your work in the valantic Support Portal.
Click Sign Out in the user menu.
You will be signed out and redirected to the logon page.